Let’s find out Today how can you calibrate yourself your riflescope without an unnecessary waste of shots. Calibration is the mechanical process that occurs thanks to the riflescope turrets and which allows you to adjust an internal mechanism that allows us to have the reticle as close as possible to the trajectory of our rifle. Thanks to calibration we can make the trajectory of the optics coincide with that of the shot. Of course you can always resort to the convenience of entrusting this operation to your trusted gunsmith who will certainly use even more tools than those that a normal user might have. The gunsmith manages to do an extremely accurate job not only due to his experience but also because he normally uses a bar of the same diameter as the riflescope to check the alignment of the rings or use centering levels to ensure that the rings are perfectly positioned. To do a self-calibration, we should have a support base and a torque wrench available, after which we must focus on the technical data of our riflescope and on a lot of concentration.
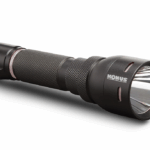
You will need to know the magnification, the diameter of the objective, the diameter of the tube of your riflescope. For example if you have our riflescope Absolute code 7178 5-40×56, magnifications are variables from 5x to 40x, the diameter of the objective is 56mm and the diameter of the tube is 30mm. If before “x” you have a single number, it means that your riflescope is at fixed magnification, as well as the diameter of the tube could be of one inch or 34mm rather than 30mm as in our example.
 The turret above is the elevation adjustment, the lateral one is called drift. Up= it doesn’t mean the reticle goes up, but it is the indication of where you want the shot to go. If the shot needs to go up you will go in the up direction (obviously it will be the reticle that will come down), same concept for drift, if the shot goes too far to the right, I will have to rotate to the left. There are factors that influence how wind, branches, so each shot can be a little different.
 That said, you will have to choose the rings based on the diameter of the tube and the breadth of the objective (also called bell) to that the riflescope does not touch the barrel but has a comfortable space to be fixed. If you choose a cantilever type attack like our #7219 it will mean that you are looking for system that allows you to keep the raised riflescope in the right position both in terms of height and depth; this requirement is very useful for all those rifles where there is no slide on the hand cover rod. If, however, you have a weapon that you use with different riflescopes, depending on the type of shooting or hunting you like to do, it becomes invaluable to have a quick release attachment so that you always have the rifle ready, knowing that the riflescope you put on holds the previous calibration, avoiding waste of time.
There are already slide attachments, as our #7237, or ring attachments. Those specific for short riflescopes are our code #7218 and then Konus offers a whole range of steel rings which differ between quick release and non-quick release, diameter 30mm or one inch and on the basis of objective diameter of riflescope, 11 mm slide and Weaver or Picatinny.


Once you have the rings available (attention, in those with universal diameter, remember to put on or take off the reducer depending on whether your riflescope is one inch and needs it or whether it is 30 mm and you will have to remove it) we mount the riflescope on the connection closing the rings loosely so that we can then possibly modify once we move on to fixing it on the rifle. The riflescope must be positioned centrally between the rings, we will only move the riflescope forward or backword once I am going to put it on the rifle.
Before fixing the riflescope, make sure you have a tripod or stand, a shooting line with the appropriate distance and target. You need working comfort so take the time to organize your shooting position.

First hook the side towards the eyepiece, trying to aim to check if it is at the right distance from the eye: the rule is that you must be able to see the ocular lens well, entirely and without distortion effects that indicate you are too close or far away. Also consider the focal adjustment of your riflescope and check how the zoom is positioned by adjusting it to the minimum in order to be more precise with long distance shots. Check the tension of the base screws with a torque wrench (we must be aware of the weight to which we must subject our screw), let’s proceed with assembling the rings. We check that the scope has no contact points on the rifle, that the bell does not touch even though it is close to the rifle and that the two rings are concentric, in the right alignment.
We fix the first screws checking the horizontal alignment of the riflescope i.e. that the tube is correctly positioned. At this point you can fully tighten the screws. With a torque wrench we now tighten the screws of the attachments in order to secure the riflescope. Always use the same cartridge for calibrations (possibly from the same batch to have greater precision).

Shoot while sitting, using a support (bag, bipod, etc.). Aim the barrel in the direction of the board, only with the eye to get a first direction and remember to wear headphones.
If, for example, you want to calibrate the rifle at 100 meters, go and look for the factory data (some riflescopes have this on the riflescope themselves) which indicates the variation at 100 meters. For exemple if a riflescope declares that 1 click equivalent to 1/2 moa, semplifying I know that 1 moa corresponds to 3 cm and so each click of that riflescope will produce a change of 1.5 cm (1/2 moa precisely). To calibrate it at 100 meters if I see a 5 cm phase shift I will have to correct by 5:1,5=3.33 that is to say 3 click.

Let’s leave immediately placing the target at 25 meters so you can make an easy first shot from which you can then take the appropriate measurements. We shoot a blow to make a first rough correction. If at 100 meters our variation is 1.5cm for each click, at 25 meters it will be 1.5cm: 4 (rounding)=0.38 cm. Check the target: for example we find that we are moved 8 cm to the left and 4 cm downward, then let’s make a first rough correction to get to the target. If at 100 meters our variation is 1,5 cm for each click, at 25 meters it will be 1,5cm:4=0,38 by 8 cm 21 click to the right (8cm0,38), in height 11 upward. We make the changes to the expected clicks and now let’s try to shoot at 100 meters. Maybe we’re ok in terms of width but in terms of height we can have a considerable difference like 13,5 cm from the centre let’s do it then 13,5cm: 1,5=9 click downward, let’s try to do them and see with another shot at 100 meters how we get on. Let’s take a little more time to think about breathing too. The correction made should have given you a center. Repeat the shot to be sure that this isn’t a fluke. There are 1/8 moa rifles which allow you to correct distances less than 1,5 cm, they are the ones for the long distance, in this case the calibration will require even greater concentration because it’s about placing the shot with extreme care.
That said, the advice is to practice a lot because only in this way will you know your weapon throughly and an affinity will be foud such as to carry out calibrations in a workmanlike manner. So the invitation is to persist in your passion and the results will come!!